Stock Photos for Newsletters and Blog Posts: Elevating Your Content with Visual Impact


In today’s content-driven digital landscape, newsletters and blog posts compete fiercely for attention. Well-written copy is essential, but visuals often determine whether a reader stays engaged or scrolls past. Stock photos play a vital role in enhancing readability, reinforcing brand identity, and increasing overall engagement across email newsletters and blog content.

Why Visuals Matter in Newsletters and Blogs

Images help break up large blocks of text, making content easier to scan and more enjoyable to read. In newsletters, a compelling image can boost click-through rates by drawing attention to featured stories or calls to action. For blog posts, visuals improve time-on-page metrics and help readers better understand complex ideas. When chosen thoughtfully, stock photos support your message rather than distract from it.

Choosing the Right Stock Photos for Your Content

Not all stock images are created equal. For newsletters and blog posts, relevance and authenticity matter most. Images should align with the topic, tone, and audience of your content. Avoid overly staged or generic visuals that feel disconnected from your message. Instead, look for photos that tell a story, show real emotions, or illustrate practical scenarios related to your niche.

High-resolution images are also essential. Crisp visuals maintain professionalism across devices, whether your audience is reading an email on a smartphone or a blog post on a desktop screen.

Consistency and Brand Identity

Using stock photos consistently helps reinforce brand recognition. This includes sticking to a similar color palette, visual style, and subject matter across your newsletters and blog posts. Many businesses create simple visual guidelines to ensure images match their brand voice—whether that voice is corporate, creative, minimalist, or friendly.

Premium libraries like Adobe Stock Images make it easier to maintain this consistency by offering curated collections and advanced search filters. Platforms such as Adobe Stock provide a wide range of professional images suitable for both editorial and marketing use, helping content creators find visuals that align with their branding goals.

Licensing and Usage Considerations

One of the biggest advantages of stock photos is clear licensing. Reputable stock platforms offer straightforward licenses that allow images to be used in newsletters, blogs, and other digital marketing materials without legal concerns. Always review license terms to confirm permitted usage, especially if your content is monetized or widely distributed.

Using licensed images protects your brand from copyright issues and ensures creators are fairly compensated, which is especially important for long-term content strategies.

Best Practices for Effective Image Use

To get the most value from stock photos, place images strategically. Feature images at the top of blog posts set expectations for readers, while in-article visuals can emphasize key points. In newsletters, limit the number of images to avoid overwhelming readers or triggering spam filters.

Finally, optimize images for web and email performance. Proper sizing and compression improve load times and ensure a smooth user experience.

Conclusion

Stock photos are more than decorative elements—they are powerful communication tools. When selected and used correctly, they enhance storytelling, strengthen brand identity, and improve engagement in newsletters and blog posts. By choosing high-quality, relevant visuals and understanding licensing best practices, content creators can elevate their written content and deliver a more professional, impactful experience to their audience.

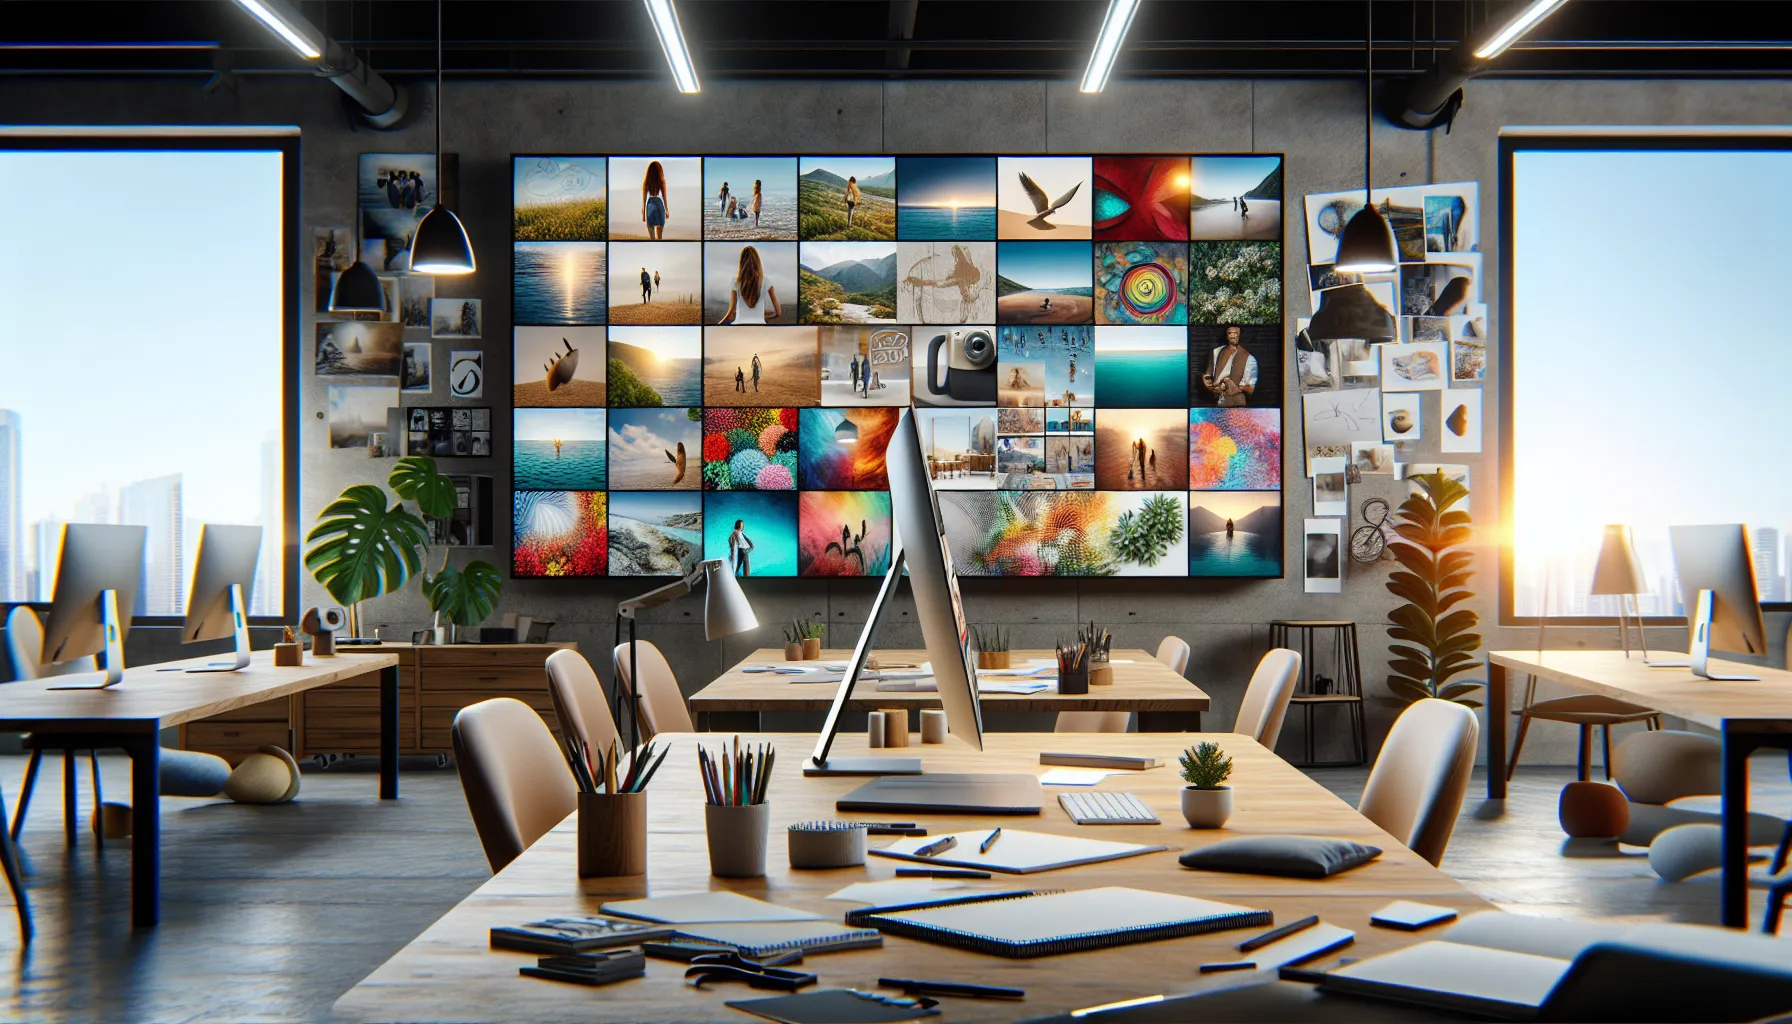
Unlock the Power of Stock Photos: Enhance Your Content and Engage Your Audience

In today’s visually driven world, stock photos have become essential for anyone looking to enhance their content. Whether you’re a blogger, marketer, or small business owner, the right image can elevate your message and connect with your audience. I’ve seen firsthand how a striking photo can transform a dull post into something captivating.

What Are Stock Photos?

Stock photos are professional images available for licensing, designed to be used in various projects. They’re typically produced by photographers or agencies and sold through stock photo websites. These images serve a wide range of purposes, from enhancing blog posts to marketing materials.

Stock photos come in two main categories: royalty-free and rights-managed.

  1. Royalty-Free: These images can be downloaded and used multiple times after a single purchase. They provide flexibility for various applications without additional fees.
  2. Rights-Managed: These images require specific licensing for each use, often coming with restrictions on duration, location, and type of project.

Many websites offer stock photos, catering to different needs. Some focus on high-quality images, while others provide budget-friendly options. Utilizing stock photos can save time and effort since it’s unnecessary to organize a photo shoot, allowing creators to quickly find images that resonate with their target audience.

Benefits of Using Stock Photos

Using stock photos offers various advantages that enhance visual content efficiently. These benefits provide both economic and creative value for bloggers, marketers, and small business owners.

Cost-Effectiveness

Stock photos deliver affordability compared to custom photography. Many stock photo websites offer images at low prices, often ranging from $1 to $20 per image. Compared to hiring a professional photographer, which can cost hundreds or thousands of dollars, stock photos make high-quality visuals accessible. This cost-effective solution allows me to allocate budget resources to other essential aspects of my projects.

Time-Saving

Stock photos significantly save time in the creative process. Searching through extensive libraries of pre-existing images often takes just a few minutes. I can quickly find images that align with my content themes rather than coordinating schedules or managing shoots. This efficient process allows me to focus on writing and designing without interruptions, boosting productivity.

Wide Range of Options

Stock photos provide an extensive selection of images suitable for various industries and themes. Whether I need business scenarios, nature landscapes, or abstract designs, stock photo websites cater to diverse needs. With thousands of images to choose from, I can easily find captivating visuals that resonate with my target audience and enhance my message.

Types of Stock Photos

Stock photos fall into two main categories: royalty-free and rights-managed. Understanding these types helps me choose the right images for my projects.

Royalty-Free Stock Photos

Royalty-free stock photos allow me unlimited use after a one-time purchase. I can incorporate them into multiple projects without additional fees. These images typically feature a wide variety of subjects and styles, making it easy for me to find the perfect visual for my needs. Royalty-free options often range in price from $1 to $20 per image, providing a cost-effective way to enhance my content.

Rights-Managed Stock Photos

Rights-managed stock photos require me to obtain a specific license for each use. Licenses vary based on factors like duration, distribution, and exclusivity. If I need an image for a particular campaign or project, rights-managed photos offer precise control over usage. While these images tend to be more expensive than royalty-free options, the unique nature and limited availability can add value to my work when needed.

How to Choose the Right Stock Photos

Selecting the right stock photos enhances content quality and audience engagement. I focus on a few critical factors in this process.

Understanding Your Needs

Identifying the specific requirements of my project informs the type of stock photos I seek. I consider the following elements:

  • Audience Demographics: Understanding who will view my content guides the imagery style, ensuring it resonates.
  • Content Theme: Aligning images with the overall theme maintains consistency and relevancy.
  • Usage Context: Determining where the images will appear, such as blogs, social media, or advertisements, influences my selections.

Evaluating Quality

Assessing the quality of stock photos is crucial for maintaining professionalism. I examine several aspects:

  • Resolution: Opting for high-resolution images ensures clarity across various platforms.
  • Composition: Choosing well-composed images creates visual interest and captures attention effectively.
  • Authenticity: Selecting authentic images that reflect real-life situations can enhance relatability and trustworthiness.

Following these guidelines helps me choose stock photos that significantly uplift my content’s message and engage my audience effectively.

Where to Find Stock Photos

Finding the right stock photos is crucial for enhancing visual content. Numerous websites and resources provide access to high-quality images that suit various needs.

Popular Stock Photo Websites

  1. Shutterstock: Offers millions of stock photos across diverse categories, ideal for marketing, blogging, and design.
  2. Adobe Stock: Integrates seamlessly with Adobe Creative Cloud, providing extensive stock photos and high-quality visuals.
  3. iStock by Getty Images: Features a vast library of stock photos at competitive prices, making it suitable for budget-conscious creators.
  4. Depositphotos: Provides affordable stock photos with flexible subscription plans, ensuring access to high-quality images.
  5. Pexels: Supplies a large selection of free stock photos, focusing on usability and aesthetics while maintaining quality.

Alternative Sources for Stock Photos

  1. Unsplash: Offers a wide range of high-resolution stock photos for free, contributed by talented photographers worldwide.
  2. Freepik: Combines free and premium stock photos, vectors, and illustrations, catering to a variety of creative projects.
  3. Pixabay: Features a diverse collection of free stock photos and illustrations available for personal and commercial use.
  4. Burst by Shopify: Provides a curated library of free stock photos tailored for e-commerce and online marketing needs.
  5. Canva: In addition to design tools, Canva has a library of stock photos available for use within its platform.

Conclusion

Stock photos are more than just pretty images; they’re powerful tools that can elevate your content and engage your audience. By understanding the differences between royalty-free and rights-managed images, you can make informed choices that fit your budget and project needs.

With countless resources available, finding the perfect stock photo has never been easier. Whether you’re a blogger, marketer, or small business owner, leveraging stock photos can save you time and money while enhancing your visual storytelling.

Embrace the vast array of options out there and let the right images transform your content into something truly captivating.


Modern Executive Office Design: Creating a Powerful Leadership Space

I’ve seen firsthand how a well-designed executive office can transform leadership effectiveness and company culture. The executive office isn’t just a workspace – it’s a powerful statement about your company’s values vision and professional standards.

Creating the perfect executive office requires careful consideration of layout ergonomics and aesthetics. From selecting the right desk to choosing appropriate lighting and incorporating technology I’ve learned that every element plays a crucial role in fostering productivity and projecting authority. Whether you’re designing a new executive suite or upgrading an existing space the right combination of functionality and sophistication will elevate your leadership presence.

What Makes an Executive Office Design Stand Out

Distinguished executive office design combines refined aesthetics with purposeful functionality to create an environment that commands respect. The strategic integration of design elements establishes a powerful leadership presence while maintaining professional efficiency.

Key Design Elements for Authority and Success

  • Premium materials including solid hardwood desks marble accents polished metals
  • Strategic desk placement facing the door with clear sightlines across the room
  • Custom built-in storage solutions that maximize space utilization
  • Floor-to-ceiling windows that flood the space with natural light
  • Professional-grade task lighting with adjustable settings
  • Advanced technology integration with concealed cable management
  • Sound-absorbing architectural elements for acoustic privacy
  • Executive-height ergonomic seating with premium upholstery
  • Sophisticated art pieces that reflect corporate values
  • Designated meeting area with comfortable guest seating

Balancing Aesthetics and Functionality

  • Multi-functional furniture pieces that serve dual purposes
  • Integrated power outlets hidden within decorative elements
  • Modular storage systems with customizable configurations
  • Ergonomic workstations designed for extended productivity
  • Digital display systems that complement interior aesthetics
  • Climate control features seamlessly incorporated into design
  • Adaptable lighting schemes for various work scenarios
  • Statement pieces that double as practical storage solutions
  • Minimal visual clutter through strategic organization systems
  • Smart technology integration maintaining clean design lines

What Makes an Executive Office Design Stand Out

Distinguished executive office design combines refined aesthetics with purposeful functionality to create an environment that commands respect. The strategic integration of design elements establishes a powerful leadership presence while maintaining professional efficiency.

Key Design Elements for Authority and Success

  • Premium materials including solid hardwood desks marble accents polished metals
  • Strategic desk placement facing the door with clear sightlines across the room
  • Custom built-in storage solutions that maximize space utilization
  • Floor-to-ceiling windows that flood the space with natural light
  • Professional-grade task lighting with adjustable settings
  • Advanced technology integration with concealed cable management
  • Sound-absorbing architectural elements for acoustic privacy
  • Executive-height ergonomic seating with premium upholstery
  • Sophisticated art pieces that reflect corporate values
  • Designated meeting area with comfortable guest seating

Balancing Aesthetics and Functionality

  • Multi-functional furniture pieces that serve dual purposes
  • Integrated power outlets hidden within decorative elements
  • Modular storage systems with customizable configurations
  • Ergonomic workstations designed for extended productivity
  • Digital display systems that complement interior aesthetics
  • Climate control features seamlessly incorporated into design
  • Adaptable lighting schemes for various work scenarios
  • Statement pieces that double as practical storage solutions
  • Minimal visual clutter through strategic organization systems
  • Smart technology integration maintaining clean design lines

Choosing the Right Layout and Floor Plan

The layout of an executive office directly impacts workflow efficiency leadership presence. A strategic floor plan creates a balance between accessibility collaboration privacy.

Open vs Private Office Configurations

Executive office layouts range from traditional private offices to modern open-concept designs. Private configurations feature enclosed spaces with soundproof walls transparent glass partitions to maintain visibility while ensuring confidentiality. Open layouts incorporate partial-height dividers flexible workstations that promote transparency accessibility. Here’s how each configuration performs across key metrics:

Configuration Type Privacy Level Collaboration Space Efficiency Cost Effectiveness
Private Office High (90%) Moderate Moderate (70%) Lower
Open Concept Low (40%) High High (90%) Higher
Hybrid Design High (80%) High High (85%) Moderate

Traffic Flow and Accessibility

An executive office layout requires clear circulation patterns distinct zones for different activities. The primary workspace sits at least 8 feet from the entrance creating a buffer zone for impromptu meetings. Secondary spaces include:

  • Meeting areas positioned within 10 feet of the main desk
  • Storage units placed along perimeter walls maximizing central space
  • Circulation paths measuring 3-4 feet wide between furniture pieces
  • Entry points aligned with building corridors reducing disruption
  • Break-out spaces located near natural light sources

The placement of furniture elements creates intuitive pathways that guide movement through the space while maintaining the executive’s command of the environment. Strategic positioning of doors windows ensures smooth traffic flow while preserving privacy during confidential discussions.

Essential Furniture Selection

Executive office furniture forms the cornerstone of a sophisticated workspace design. Premium furniture pieces create an environment that balances authority with functionality, reflecting leadership status while ensuring optimal performance.

Executive Desk Options

A distinguished executive desk serves as the focal point of authority in the office space. Traditional solid wood desks with rich finishes project timeless elegance while modern designs featuring glass metal elements reflect contemporary leadership. Here are key considerations for executive desk selection:

  • L-shaped configurations maximize workspace efficiency with separate areas for computer work documents
  • Height-adjustable standing desks promote movement flexibility throughout the workday
  • Built-in technology ports streamline connectivity for multiple devices accessories
  • Credenza combinations provide additional surface area storage capabilities
  • Custom millwork desks offer personalized dimensions finishes material selections

Ergonomic Seating Solutions

  • Multi-point adjustment mechanisms for personalized positioning
  • High-back designs with integrated lumbar neck support
  • Premium upholstery options including genuine leather mesh combinations
  • Synchronized tilt functions allowing natural body movement
  • Extended warranties covering mechanical components upholstery wear
Chair Component Ergonomic Feature Benefit
Seat Height 16-21″ adjustment range Promotes proper posture circulation
Armrests 4D adjustability Reduces shoulder neck strain
Backrest Dynamic recline 95-120° Supports various working positions
Seat Depth 2-4″ adjustment range Accommodates different body types

Lighting Strategies for Executive Spaces

Effective lighting design in executive offices combines natural and artificial light sources to create an environment that enhances productivity and projects authority. The right lighting strategy supports both functional needs and aesthetic goals while maintaining professional standards.

Natural Light Optimization

Natural light integration stands as a cornerstone of executive office design through strategically placed windows and glass partitions. Large windows positioned at optimal angles maximize daylight penetration while minimizing glare on computer screens and work surfaces. I recommend installing automated blinds or smart glass technology to control natural light levels throughout the day, maintaining consistent illumination in the executive workspace.

Task and Ambient Lighting

  • Indirect lighting fixtures that eliminate harsh shadows
  • Under-cabinet LED strips for subtle accent illumination
  • Wall washers to highlight architectural features
  • Programmable lighting scenes for different activities:
  • Video conferencing: 4000K balanced lighting
  • Document review: 5000K task lighting
  • Client meetings: 3000K warm ambient light
Lighting Type Color Temperature Recommended Lumens
Task Lighting 4000K – 5000K 450 – 550
Ambient Lighting 3000K – 3500K 300 – 400
Accent Lighting 2700K – 3000K 200 – 300

Color Psychology and Materials

Color selection and material choices in executive office design create powerful psychological impacts while establishing a distinguished professional atmosphere. These elements work together to influence mood productivity and perception.

Professional Color Schemes

Professional executive spaces benefit from a strategic color palette that combines:

  • Navy blue elements for trust and authority in wall accents or upholstery
  • Charcoal gray tones for sophistication in flooring or furniture pieces
  • Forest green accents for growth and stability in decorative elements
  • Rich brown wood tones for warmth in desks and cabinetry
  • Cream or taupe neutrals for balance in wall colors

Color combinations enhance specific areas:

Area Primary Color Accent Color Psychological Effect
Main Office Navy Blue Gold Authority & Success
Meeting Area Warm Gray Green Focus & Growth
Reception Taupe Brown Welcome & Stability

Premium Finishes and Textures

Executive office materials communicate quality through carefully selected finishes:

  • Solid hardwood surfaces with hand-rubbed finishes for desk tops
  • Natural stone elements like marble or granite for accent pieces
  • Brushed metals in gold or silver for hardware and lighting fixtures
  • Full-grain leather upholstery for seating and wall panels
  • Wool carpet with subtle patterns for sound absorption
Material Application Benefits
Walnut Wood Desk & Storage Durability & Elegance
Leather Seating & Walls Sophistication & Comfort
Natural Stone Accent Pieces Luxury & Permanence
Glass Partitions Transparency & Light

Technology Integration and Infrastructure

Smart Office Systems

Modern executive office design centers on integrated smart systems that enhance control efficiency. Voice-activated controls manage lighting temperature lighting systems audio equipment while mobile apps enable remote monitoring security features. Connected solutions include:

  • Automated climate controls with zone-specific settings
  • Smart lighting systems with occupancy sensors preset scenes
  • Integrated AV systems for seamless presentations
  • Digital room scheduling displays
  • Automated window treatments for glare control

Connectivity Requirements

Executive offices demand robust network infrastructure supporting high-speed connectivity. Essential components include:

  • Enterprise-grade WiFi access points
  • Dedicated high-speed internet lines
  • Multiple charging stations USB-C power delivery
  • Wireless presentation systems
  • Secure VPN access points

Video Conferencing Setup

Professional video conferencing capabilities require:

Equipment Specifications
Camera 4K Ultra HD with auto-focus
Microphone Beamforming array with noise cancellation
Display 65″ 4K LED with anti-glare coating
Lighting Adjustable LED panels 5000K color temperature
Acoustics Sound-absorbing panels with NRC 0.95

Cable Management

Integrated cable management maintains a clean aesthetic through:

  • Under-desk cable trays concealing power data lines
  • Floor-mounted power data ports
  • Wireless charging pads built into surfaces
  • Hidden wall conduits for AV equipment
  • Modular furniture with built-in wire management

Acoustic Technologies

  • Sound masking systems with programmable zones
  • Acoustic panels with custom fabric finishes
  • Double-pane glass walls with STC ratings 45+
  • Micro-perforated ceiling tiles
  • Door sweep seals sound-blocking thresholds

Creating Meeting and Collaborative Areas

Strategic Meeting Room Design

Executive office design incorporates dedicated meeting spaces that balance formality with functionality. A primary conference room accommodates 8-12 participants with a solid wood conference table measuring 12 x 4 feet. Premium leather executive chairs feature ergonomic adjustments for comfort during extended meetings. Integrated technology includes:

  • 75-inch 4K display screens for presentations
  • Flush-mounted ceiling speakers for clear audio
  • Built-in power outlets every 3 feet along the table
  • Recessed lighting with preset scenes for different meeting types

Flexible Collaboration Zones

Adjacent collaborative spaces support impromptu discussions with flexible furniture configurations:

  • Mobile whiteboards with magnetic surfaces
  • Modular seating groups for 4-6 people
  • Height-adjustable tables with power integration
  • Sound-absorbing panels on walls for acoustic privacy

Technology Integration

Modern executive meeting spaces feature seamless technology solutions:

  • Wireless presentation systems with one-touch connectivity
  • Video conferencing cameras with 120-degree field of view
  • Integrated room scheduling displays
  • Smart lighting controls with occupancy sensors
  • Digital collaboration tools with cloud storage access
Meeting Space Element Specifications Purpose
Conference Room Size 400 sq ft Accommodates 12 people comfortably
Lighting Level 500 lux Optimal for video conferencing
Acoustic Rating NRC 0.85 Ensures speech privacy
Network Speed 1 Gbps Supports multiple video streams

Transitional Areas

  • 6-foot wide corridors for easy movement
  • Built-in refreshment stations
  • Acoustic separation through glass partitions
  • Digital wayfinding displays
  • Touchdown spaces for pre-meeting preparation

Conclusion

A thoughtfully designed executive office is more than just a workspace – it’s a powerful statement of leadership and company values. I’ve shown how every element from premium materials to strategic layouts plays a crucial role in creating an environment that commands respect and drives success.

The perfect executive office balances sophisticated aesthetics with practical functionality through careful consideration of lighting technology furniture and collaborative spaces. When these elements work in harmony they create a space that not only elevates leadership presence but also enhances productivity and professional efficiency.

By implementing these design principles you’ll create an executive office that reflects your leadership style inspires confidence and provides the perfect setting for high-level decision-making and collaboration.


Digital Watercolor Art: A Complete Guide to Mastering Modern Painting Techniques

Digital watercolor art has revolutionized the way we create and experience traditional painting techniques. By combining the timeless beauty of watercolor with modern technology we’re able to explore endless creative possibilities without the constraints of physical materials.

We’ve seen a remarkable surge in digital watercolor’s popularity among both professional artists and enthusiasts. This innovative medium offers the fluidity and unpredictability of traditional watercolors while providing the convenience of digital tools like layers undo buttons and instant color adjustments. Whether you’re a seasoned artist or just starting your creative journey digital watercolor opens up a world where experimentation meets precision.

What Is Digital Watercolor Art

Digital watercolor art merges traditional painting techniques with digital technology to create artwork that mimics the fluid properties of watercolor paint. This artistic medium uses specialized software to replicate watercolor effects including color blending transparency gradients.

Traditional vs Digital Watercolor Techniques

Digital watercolor art differs from traditional methods in several key aspects:

  • Control: Digital tools offer precise brush control with options to undo modify or duplicate strokes
  • Materials: Traditional requires physical supplies while digital needs only a device software
  • Layering: Digital layers remain separate flexible entities without paper damage or color mixing
  • Color Management: Digital provides infinite color combinations without paint mixing or drying time
  • Texture Effects: Software replicates paper grain water pooling brush textures instantly
  • Storage: Digital files occupy no physical space preserve quality indefinitely
  • Adobe Fresco: Professional-grade watercolor simulation with live brushes fluid dynamics
  • Procreate: iPad-exclusive app featuring realistic water blending custom brush creation
  • Rebelle: Specialized in physics-based paint behavior natural media simulation
  • Corel Painter: Advanced watercolor tools with customizable paper textures brush settings
  • ArtRage: Affordable option providing natural painting experience intuitive interface
Software Platform Price Range
Adobe Fresco Desktop/iPad $9.99/month
Procreate iPad $9.99 one-time
Rebelle Desktop $89.99 one-time
Corel Painter Desktop $429 one-time
ArtRage Multi-platform $30-80 one-time

Essential Digital Tools for Watercolor Artists

Digital Watercolor Art requires specific hardware and software tools to create authentic watercolor effects. These essential components enable artists to produce professional-quality artwork with precision and flexibility.

Tablets and Styluses

Professional digital watercolor creation depends on pressure-sensitive drawing tablets in three categories:

  • Screen Tablets: Wacom Cintiq 16 or XP-PEN Artist Pro provides direct on-screen drawing with 8,192 pressure levels
  • Pen Tablets: Wacom Intuos or Huion H610 Pro V2 offers budget-friendly options for connecting to external displays
  • Tablet Computers: iPad Pro with Apple Pencil 2 or Samsung Galaxy Tab S8 with S Pen delivers portable creation capabilities

The optimal stylus features include:

  • Tilt recognition for natural brush angles
  • Palm rejection technology
  • Minimal input lag
  • Replaceable nibs
  • Extended battery life

Digital Brushes and Textures

Digital watercolor brushes replicate traditional media through customizable settings:

  • Brush Properties:
  • Flow rate control
  • Opacity variation
  • Edge softness
  • Texture mapping
  • Color blending modes

Adobe Fresco offers specialized watercolor brushes that simulate:

  • Granulation effects
  • Paper texture interaction
  • Edge bleeding
  • Color diffusion
  • Wet-on-wet techniques

Custom texture libraries enhance artwork with:

  • Handmade paper grains
  • Canvas weaves
  • Organic patterns
  • Environmental textures
  • Material surfaces

Each brush and texture combination creates unique effects for Digital Watercolor Art, allowing artists to develop distinctive styles while maintaining the traditional watercolor aesthetic.

Core Techniques for Digital Watercolor Painting

Digital Watercolor Art combines traditional painting principles with digital precision. These fundamental techniques form the foundation for creating authentic watercolor effects in digital formats.

Creating Realistic Water Effects

Digital tools replicate water behavior through specialized brushes with customizable flow rates. Artists control water saturation by adjusting opacity settings from 20% to 100% to create effects like:

  • Hard edges for detailed work with 80-100% opacity
  • Soft blends using 40-60% opacity settings
  • Subtle washes with 20-30% opacity levels
  • Granulation effects through texture brushes
  • Blooming techniques using water simulation tools

Mastering Color Blending

Adobe image software enhances color blending capabilities through digital color mixing tools. The process involves:

  • Using color wheel selections for harmonious combinations
  • Adjusting hue saturation from 0-100%
  • Creating custom color palettes
  • Implementing gradient maps for smooth transitions
  • Applying color picking tools for precise matching
  • Transparent overlays at 10-90% opacity
  • Mask applications for selective effects
  • Blend mode combinations like multiply or overlay
  • Non-destructive editing options
  • Multiple layer groups for organized workflows
Layer Type Common Uses Recommended Opacity Range
Base Wash Initial color application 30-50%
Detail Layer Fine elements 70-100%
Texture Layer Environmental effects 20-40%
Highlight Layer Light touches 10-30%

Benefits of Creating Watercolor Art Digitally

Digital Watercolor Art transforms traditional painting limitations into boundless creative opportunities. The digital format combines the organic feel of watercolor with advanced technological capabilities.

Unlimited Creative Freedom

Digital watercolor platforms provide extensive creative control through customizable features:

  • Instant color adjustments across unlimited palettes
  • Multiple layer experimentation without paper damage
  • Risk-free testing of different brush styles techniques
  • Non-destructive editing with preserved original artwork
  • Seamless integration of various artistic elements
  • Advanced brush customization with pressure sensitivity controls

Time-Saving Features

Digital tools streamline the watercolor creation process through efficient workflows:

  • Quick color mixing with precise digital color wheels
  • Instant drying effects versus traditional wait times
  • Multiple undo options for immediate corrections
  • Automated texture generation for complex backgrounds
  • Built-in selection tools for precise masking
  • Rapid duplication of successful techniques
  • Easy project organization with Adobe Creative Cloud storage
  • Swift export options for various digital formats

The digital format enhances traditional watercolor techniques while introducing innovative capabilities that expand artistic possibilities. Artists gain precise control over their creative process while maintaining the distinctive charm of watercolor effects.

Tips for Achieving an Authentic Watercolor Look

Digital Watercolor Art creates authentic watercolor effects through precise control of digital tools. The following techniques enhance the realism of digital watercolor paintings while maintaining traditional characteristics.

Brush Settings and Pressure Sensitivity

Digital brushes replicate traditional watercolor behavior through customizable settings. Adjusting brush opacity to 30-60% creates transparent washes while pressure sensitivity settings of 75-90% control paint flow. Configure these essential brush parameters:

  • Set flow rate between 45-65% for natural paint spread
  • Enable tilt recognition for varied brush angles
  • Adjust brush wetness between 40-80% for controlled bleeding effects
  • Configure brush grain to 25-35% for textural variety
  • Set minimum brush size to 15-20% for delicate details

Paper Textures and Effects

Paper texture settings influence how digital watercolor interacts with the canvas surface. Adobe image creation tools offer multiple texture options:

  • Hot press textures (150-300 DPI) for smooth blending
  • Cold press surfaces (200-400 DPI) for granulation effects
  • Rough textures (300-600 DPI) for maximum paint absorption
  • Custom grain patterns at 25-45% opacity
  • Texture scale adjustments between 50-150%
Texture Type DPI Range Opacity Range Effect
Hot Press 150-300 20-35% Smooth Blends
Cold Press 200-400 35-50% Medium Grain
Rough 300-600 45-65% Heavy Texture

Conclusion

Digital watercolor art has revolutionized the way we approach traditional painting techniques while opening new doors for artistic expression. We’ve seen how this innovative medium bridges the gap between classical watercolor charm and modern digital capabilities.

The blend of pressure-sensitive tools specialized software and customizable features empowers artists to create stunning pieces that maintain the authentic feel of traditional watercolor. Whether you’re a seasoned artist or just starting your creative journey digital watercolor provides the perfect platform to explore experiment and grow.

As we embrace these digital innovations we’re excited to see how artists will continue pushing boundaries and creating breathtaking works that showcase the best of both traditional and digital worlds.


Adobe Image Software Guide: Top Tools and Formats for Digital Creation in 2024

Adobe images have revolutionized the way we create and edit digital content. From simple photo adjustments to complex graphic designs we’ve seen Adobe’s suite of tools transform the creative industry over the past few decades.

When we talk about Adobe images we’re referring to files created or edited using Adobe’s powerful software like Photoshop Illustrator and Lightroom. These tools offer unmatched versatility making them essential for photographers designers and digital artists worldwide.

The Adobe ecosystem supports various image formats and provides advanced features that help us bring our creative visions to life. Whether we’re working on professional projects or personal endeavors Adobe’s image editing capabilities continue to set the industry standard for digital image manipulation.

What is Adobe Image Software?

Adobe image software encompasses a comprehensive suite of professional-grade applications designed for digital image creation, manipulation, and enhancement. These tools form the backbone of modern digital imaging workflows across multiple creative disciplines.

Adobe’s Different Image Editing Programs

  • Adobe Photoshop: Creates detailed image edits manipulates photos enhances graphics through layers filters masks
  • Adobe Lightroom: Organizes edits processes large volumes of photos with non-destructive adjustments color correction
  • Adobe Illustrator: Develops vector graphics logos illustrations scalable artwork
  • Adobe Fresco: Produces Digital Watercolor Art natural media paintings sketches with live brushes
  • Adobe Photoshop Elements: Offers simplified photo editing tools for beginners at a more affordable price point

Key Features and Capabilities

  • Advanced Layer Management

  • Multiple layer support
  • Layer masks adjustments
  • Blend modes effects
  • Professional Color Tools

  • Color correction
  • Color grading
  • ICC profile management
  • File Format Support

  • RAW image processing
  • Multiple export options
  • Cross-platform compatibility
  • Creative Tools

  • AI-powered features
  • Neural filters
  • Content-aware tools
  • Digital painting brushes
  •  
  • Cross-device syncing
  • Asset management
  •  
Software Primary Use Target User
Photoshop Photo editing & manipulation Professionals
Lightroom Photo organization & processing Photographers
Illustrator Vector graphics Designers
Fresco Digital painting Artists
Elements Basic photo editing Hobbyists

Adobe Photoshop: The Industry Standard

Adobe Photoshop sets the benchmark for professional image editing software through its comprehensive toolset and advanced capabilities. This powerhouse application enables creators to transform adobe images into stunning visual masterpieces.

Essential Tools and Functions

Photoshop’s interface features an intuitive arrangement of essential editing tools:

  • Layer Management Panel for organizing multiple design elements
  • Selection Tools including Magic Wand Magnetic Lasso for precise object isolation
  • Adjustment Tools for brightness contrast exposure saturation
  • Brush Tools with customizable settings for detailed retouching
  • Shape Tools for creating vector elements text graphics
  • Color Management Systems for consistent output across devices
  • Content-Aware Fill for seamless object removal background reconstruction
  • Neural Filters powered by Adobe Sensei AI for sophisticated editing effects
  • Camera Raw integration for professional-grade photo processing
  • Smart Objects for non-destructive editing preservation
  • Advanced Compositing Tools for combining multiple images
  • Perspective Warp for correcting complex distortions
  • 3D editing capabilities for creating depth dimension
  • Digital Watercolor Art effects through customizable brushes filters
Feature Category Number of Tools File Format Support
Selection Tools 7+ 20+ formats
Adjustment Layers 16+ PSD PSB RAW
Filter Gallery 200+ JPEG PNG TIFF
Brush Presets 1000+ AI EPS PDF

Adobe Lightroom: Professional Photo Management

Adobe Lightroom stands as a powerful photo management solution for organizing, editing, and enhancing digital images through an intuitive interface. This specialized adobe image software streamlines workflow efficiency while maintaining professional-grade output quality.

Library Organization Tools

Lightroom’s library management system offers comprehensive organization through:

  • Smart Collections that automatically sort images based on custom criteria including camera metadata, ratings, keywords
  • Virtual copies enabling multiple editing versions without duplicating original files
  • Facial recognition technology categorizing photos by people
  • Color labels and flag ratings for quick filtering
  • Keyword tagging system supporting hierarchical organization
  • GPS location data integration for geographic image sorting
  • Advanced color grading with selective color adjustments
  • Exposure controls managing highlights, shadows, whites, blacks
  • Lens correction tools removing distortion and chromatic aberration
  • Detail enhancement options for sharpening and noise reduction
  • Local adjustment brushes for precise editing of specific areas
  • Preset systems allowing one-click editing styles application
  • Batch processing capabilities for consistent editing across multiple images
  • RAW file support enabling maximum editing flexibility
Feature Category Number of Tools
Organization 15+
Color Editing 12+
Local Adjustments 8+
Presets 100+ included
Export Options 20+ formats

Working with Adobe Image Formats

Adobe image formats provide specialized options for saving digital artwork while maintaining quality across different use cases. These formats integrate seamlessly within the Adobe Creative Suite, offering optimal compatibility and preservation of editing capabilities.

Common File Types

  • PSD (Photoshop Document) – Preserves layers, masks, adjustments with maximum editability
  • AI (Adobe Illustrator) – Stores vector graphics with infinite scalability
  • TIFF – Supports high-quality images with lossless compression options
  • PDF – Ensures universal compatibility while maintaining image integrity
  • JPG – Offers compressed file sizes ideal for web usage
  • PNG – Maintains transparency with lossless compression
  • PSB (Photoshop Big) – Handles extremely large files exceeding 2GB
  • EPS – Enables cross-platform vector compatibility
  • Export in PSD format during active editing to preserve all layers
  • Save JPG files at 72 DPI for web content using “Save for Web” feature
  • Use PNG-24 for images requiring transparency
  • Set TIFF compression to LZW for optimal file size reduction
  • Enable “Maximum Compatibility” when saving PSD files
  • Archive master files in original format with layers intact
  • Create separate versions for print (300 DPI) digital display (72 DPI)
  • Implement metadata tags for improved file organization
  • Save incremental versions using numerical suffixes
  • Export multiple formats simultaneously using batch processing
Format Best Use Case Typical File Size Maximum Resolution
PSD Editing 100MB – 2GB 30,000 x 30,000
JPG Web Content 100KB – 5MB 65,535 x 65,535
TIFF Print Media 50MB – 500MB 4GB per image
PNG Web Graphics 1MB – 20MB 2GB per image

Adobe Image Pricing and Subscription Options

Adobe offers flexible subscription plans for accessing its image editing software suite, with pricing options tailored to different user needs. The comprehensive plans include access to essential Adobe image editing applications like Photoshop, Lightroom and Illustrator.

Individual vs Business Plans

Individual Creative Cloud plans start at $9.99/month for single-app access to applications like Photoshop. The Photography plan bundles Photoshop and Lightroom for $9.99/month, while the All Apps plan provides access to 20+ creative applications for $54.99/month. Business plans offer additional features:

Plan Type Monthly Cost Features
Individual Single App $9.99 1 creative app, 100GB storage
Photography Plan $9.99 Photoshop + Lightroom, 20GB storage
All Apps Individual $54.99 20+ creative apps, 100GB storage
Business Team $84.99/user All apps, advanced features, 1TB storage

Free Trial and Student Offers

Adobe provides a 7-day free trial for testing any Creative Cloud application before purchase. Students and teachers receive special pricing:

  • 60% discount on the Creative Cloud All Apps plan ($19.99/month)
  • Access to premium Adobe image editing features
  • Free Adobe Portfolio website
  • 100GB of cloud storage
  • Latest software updates included
  • Available with valid school identification

The student and teacher plans include the complete Adobe image creation suite, making professional tools accessible for educational purposes at a significantly reduced cost.

Conclusion

Adobe’s image software suite stands as the cornerstone of digital creativity with its unmatched capabilities and professional-grade tools. We’ve explored how this powerful ecosystem empowers creators through versatile applications like Photoshop Lightroom and Illustrator alongside specialized file formats that maintain quality across platforms.

Whether you’re a professional designer or an aspiring artist Adobe’s flexible pricing options make these industry-standard tools accessible to everyone. From robust image manipulation to seamless organization the Adobe Creative Suite continues to shape the future of digital imagery and creative expression.