We’re witnessing an exciting revolution in the art world as digital watercolor painting transforms how artists create and edit their work. This innovative approach combines the timeless beauty of traditional watercolors with the flexibility and convenience of digital tools.
The possibilities are endless when it comes to digital watercolor – from easy color palette adjustments to seamless revisions without starting over. Unlike traditional watercolors where mistakes can be permanent, digital platforms offer the freedom to experiment without consequences. While the learning curve might seem steep at first, the ability to scale artwork without quality loss and build colors from light to dark makes it an invaluable skill for modern artists.
Understanding Digital Watercolor Art
Digital watercolor combines traditional painting techniques with modern digital tools to create stunning artworks. Here are the key aspects of digital watercolor:
Techniques and Controls
- Apply wet-on-dry techniques for precise brush control
- Layer colors strategically to build depth
- Adjust opacity levels to create transparent effects
- Use digital brushes to simulate traditional watercolor strokes
- Create texture through specialized brush settings
Color Management
- Select colors from an unlimited digital palette
- Edit hues instantly without color mixing issues
- Maintain color consistency across the artwork
- Apply glazes digitally for depth enhancement
- Create custom color swatches for future use
Digital Advantages
| Feature | Benefit |
|---|---|
| Undo Function | Instant correction of mistakes |
| Layers | Non-destructive editing |
| Scaling | High-quality prints at any size |
| Brush Library | Multiple brush effects available |
| Color Editing | Real-time color adjustments |
- Import custom paper grain textures
- Apply multiple texture layers
- Adjust texture opacity for realistic effects
- Combine different paper styles
- Create unique surface characteristics
The digital format transforms traditional watercolor limitations into opportunities for creative expression. Artists can experiment freely with colors, textures and techniques while maintaining complete control over their artwork’s development.
Essential Tools and Setup
Creating digital watercolour art requires a specific combination of hardware tools software solutions. Here’s what you’ll need to get started with your digital watercolour journey.
Digital Brushes and Hardware
Our essential hardware setup includes a drawing tablet with pressure sensitivity like the Wacom Intuos Pro or XP-Pen Artist. A stylus with at least 8,192 pressure levels enables precise brush control while creating digital watercolour effects. Here’s what to consider:
- Drawing Tablets
- Entry-level: Wacom One 13
- Mid-range: XP-Pen Artist 15.6 Pro
- Professional: Wacom Cintiq Pro 24
- Stylus Features
- Pressure sensitivity
- Tilt recognition
- Programmable buttons
- Palm rejection technology
- Professional Software
- Photoshop: Custom brush creation extensive layer controls
- Procreate: Intuitive interface water flow simulation
- Rebelle: Realistic watercolour physics color mixing
- Key Features
- Customizable brush settings
- Layer management system
- Color palette organization
- Canvas texture options
- File format compatibility
| Software Type | Price Range | Best For |
|---|---|---|
| Photoshop | $20.99/month | Professional work |
| Procreate | $9.99 one-time | iPad users |
| Rebelle | $89.99 one-time | Realistic effects |
Traditional vs Digital Watercolor Techniques
Digital watercolor transforms traditional painting methods through innovative digital tools while maintaining the essence of watercolor techniques. Understanding the key differences helps artists leverage the strengths of each medium.
Wet on Wet Effects
Digital watercolor platforms adapt the traditional wet-on-wet technique through specialized brushes and blending algorithms. This method creates soft, fluid transitions between colors by simulating how paint spreads on wet paper. Digital artists achieve this effect using reduced opacity settings, layered brush strokes and specialized watercolor brushes that mimic paint dispersion patterns.
Dry Brush Methods
The dry brush technique in digital watercolor offers precise control over detail work through customized brush settings. Using a brush with 60% opacity and 10% water flow creates defined strokes perfect for adding texture and fine details. Digital platforms enhance this technique by allowing artists to:
- Adjust brush hardness for varied edge control
- Layer multiple strokes without paper damage
- Create custom brush presets for consistent results
- Apply precise pressure sensitivity for natural-looking marks
| Attribute | Traditional | Digital |
|---|---|---|
| Opacity Control | Manual mixing | Precise percentage control |
| Texture Build-up | Physical paint layers | Non-destructive layers |
| Detail Control | Paper texture dependent | Customizable brush settings |
| Color Consistency | Variable | Exact color matching |
Core Digital Watercolor Techniques
Digital watercolor techniques combine traditional painting principles with digital precision. These methods enhance artistic expression while maintaining the characteristic flow of watercolor media.
Color Blending and Layering
Digital watercolor blending creates smooth color transitions through specialized brush settings. Here’s how to achieve dynamic blending effects:
- Start with light base colors on separate layers
- Use soft-edged brushes at 20-40% opacity for gradual buildups
- Apply darker colors in small strokes to create depth
- Blend colors using specialized watercolor mixing tools
- Create gradient effects by layering complementary hues
- Adjust layer opacity to control color intensity
- Import custom paper grain textures for realistic surfaces
- Apply texture overlays at 10-30% opacity for subtle effects
- Use textured brushes to simulate paper tooth
- Create wet edges by varying brush pressure sensitivity
- Implement granulation effects through specialized brush settings
- Add paper patterns to simulate different media surfaces
| Texture Type | Opacity Range | Best Used For |
|---|---|---|
| Paper Grain | 10-15% | Base texture |
| Canvas | 20-25% | Heavy papers |
| Watercolor | 25-30% | Color pooling |
| Cold Press | 15-20% | Fine details |
Tips for Creating Realistic Digital Watercolors
Start with Light Base Colors
Digital watercolor painting starts with light washes as the foundation. Apply translucent layers at 20-30% opacity to build depth gradually. Create a custom color palette before starting to maintain consistency throughout the artwork.
Master Digital Brush Control
- Vary brush pressure to create organic transitions between strokes
- Layer multiple brush types to achieve textural depth
- Use soft-edged brushes for smooth color blending
- Apply eraser tools strategically to lift color in select areas
Simulate Paper Texture
- Import paper grain textures to replicate traditional surfaces
- Adjust texture opacity between 15-25% for realistic effects
- Apply texture overlays after completing base colors
- Create custom paper patterns for unique surface characteristics
Control Water Effects
- Use specialized digital brushes to mimic wet-on-wet techniques
- Set brush flow rates between 40-60% for natural color spread
- Adjust brush dynamics to control paint dispersion
- Create edge bleeding effects with custom brush settings
Color Management
| Technique | Opacity Range | Purpose |
|---|---|---|
| Base Wash | 20-30% | Initial color layer |
| Mid-tones | 40-60% | Building depth |
| Details | 70-90% | Adding definition |
Layer Organization
- Create separate layers for each color group
- Set layer blending modes to multiply for transparency
- Use clipping masks for precise color containment
- Maintain non-destructive workflow with adjustment layers
- Configure pressure sensitivity for natural strokes
- Customize brush hardness based on desired effects
- Adjust brush spacing for continuous flow
- Set brush angle jitter for organic mark-making
Conclusion
We’re thrilled to see how digital watercolor has revolutionized the artistic landscape! The fusion of traditional watercolor charm with digital innovation opens up endless possibilities for artists at every skill level. The ability to experiment freely while maintaining the distinctive watercolor aesthetic makes this medium truly special.
We can’t wait to see how you’ll use these incredible tools and techniques to create your own masterpieces. Whether you’re a seasoned artist or just starting out digital watercolor welcomes everyone with its forgiving nature and boundless creative potential. So grab your tablet pick up that stylus and let your creativity flow!
 The Dollar Photo Club is closing in less than a month – for good. This announcement has been going around Facebook, when the stock site posted the closure on its page. The reason behind the termination is Adobe’s acquisition of the website and its parent Fotolia. This may still come as a surprise to some current members, but it is time for them find a better Dollar Photo Club alternative before April 15, 2025.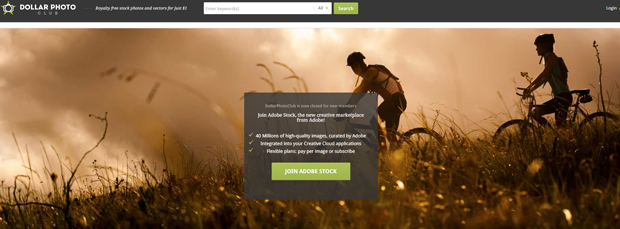
 There are a lot of reasons why you should be choosing Adobe Stock as your stock photo agency of choice. With all the different agencies out there that are offering you the same thing, Adobe is offering you something different.